Back up Logic Pro
Download
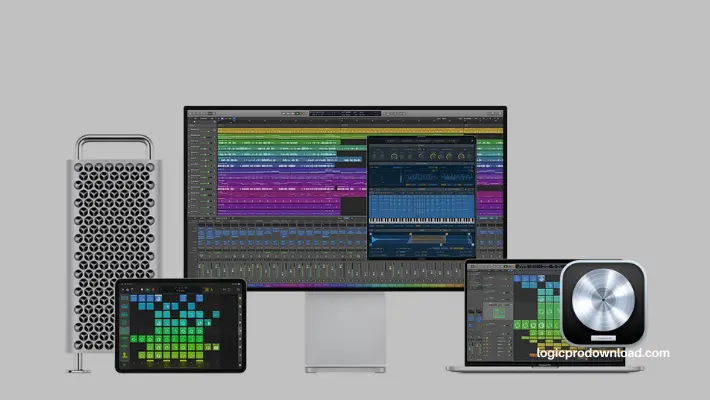
Logic Pro is a digital audio workstation (DAW) software application for the macOS operating system. It is designed for music production, composition, and audio recording. Logic Pro offers a range of features for audio editing, mixing, and mastering, as well as virtual instruments, MIDI sequencing, and score notation.
Logic Pro is used by professional musicians, producers, and audio engineers to create high-quality music recordings and compositions. It supports a wide range of audio formats and has built-in effects and instruments such as virtual synthesizers, samplers, and drum machines. Logic Pro also offers advanced features like automation, MIDI control, and audio quantization, making it a versatile tool for music production.
To ensure the safety of your Logic Pro projects, it is advisable to back up your current copy of the Logic Pro application and all existing projects before updating the software. This step is crucial, as it enables you to transfer your files to another Mac and continue working on them in the previous version of Logic Pro if required. Additionally, it is recommended to perform periodic backups of your Logic Pro files to avoid the risk of data loss.
Importance of Back Up Logic Pro
I understand that you may feel that backups are unnecessary, especially if your Mac is in excellent condition and you take care of it every day. However, I must emphasize that backups are crucial to ensure the safety of your data. If your hard disk fails, which can happen unexpectedly, you may lose all your valuable information. But if you have backups, you can avoid this disaster.
Given the importance of backups, let's move on to the question of how to make them. This article will guide you on how to backup your Logic-based Mac.
How to Use the Back Up Logic Pro Application
To back up your current Logic Pro application, follow these steps:
- Create a new folder in the Applications directory with a name that includes the application name and version, such as "Logic Pro 0.2.4". You can check the version of Logic Pro by opening the application and selecting "About Logic Pro" from the Logic Pro menu.
- Select the Logic Pro application in the Applications folder and choose "File" > "Compress 'Logic Pro'". The compression process may take a few minutes.
- Move the resulting "Logic Pro.zip" file into the folder you created in step 1.
- Finally, move the folder containing the .zip file to a backup drive to ensure that it's safely stored and easily accessible if needed.
Back up Logic Pro Projects
To back up Logic Pro projects, you have two options. You can either use a system-wide backup solution like Time Machine or manually copy your projects to a dedicated backup drive.
If you prefer to use Time Machine, simply connect an external hard drive to your macOS, and set up Time Machine to automatically back up your files. Time Machine will make hourly, daily, and weekly backups of all the files on your Mac, including your Logic Pro projects.
Alternatively, you can manually copy your projects to a dedicated backup drive by selecting the project folder in the Finder and dragging it to the backup drive. This method allows you to have more control over your backups and choose which projects to back up and when.
Regardless of the backup method you choose, it's essential to ensure that your Logic Pro projects are regularly backed up to prevent data loss in case of hardware or software failures.
Including the exclusive Final Cut Pro Latest Version 11.0 and more Pro Tools.
How to Back up Your Mac with Time Machine
- Connect a storage device to use for backups
- Select your storage device in Time Machine settings
- Open Time Machine settings on your Mac.
- In Time Machine settings, select your external storage device as your backup destination.
- If your external storage device contains Time Machine backups from another Mac, you may be asked to claim the existing backups so that they become part of the backups for this Mac. Alternatively, you can choose to start a new backup instead.
- Make Backup
- Back up automatically:
- Back up manually:
- If a backup is in progress, the Time Machine menu shows how much of the backup is complete.
- When a backup is not in progress, the Time Machine menu shows the date and time of the latest backup.
o set up Time Machine backups, you'll need to connect an external storage device to your Mac, such as a USB drive or Thunderbolt drive. Alternatively, you can explore other backup disks that are compatible with Time Machine.
It's important to note that you should use this storage device solely for your Time Machine backups and not for storing other files. This helps ensure that your backups remain organized and easily accessible.
It's also recommended that your backup disk has at least twice the storage capacity of every disk or volume you're backing up. If your backup disk doesn't have sufficient storage space to hold a complete backup, Time Machine will alert you and prompt you to either exclude certain files or upgrade your backup disk.
By following these guidelines, you can ensure that your Time Machine backups are effective and comprehensive, providing you with peace of mind and protection against data loss.
When you connect your external storage device to your Mac, it may prompt you to use it for Time Machine backups. If it doesn't ask, you can follow these steps to set up Time Machine backups:
If you're running macOS Ventura or later, choose Apple menu > System Settings, click General in the sidebar, and then click Time Machine on the right.
If you're running an earlier version of macOS, choose Apple menu > System Preferences, and then click Time Machine.
For macOS Ventura or later, click the add button (+) and follow the onscreen instructions.
For earlier versions of macOS, click Select Backup Disk, and then follow the onscreen instructions.
By following these steps, you can ensure that your Time Machine backups are saved to the correct destination and easily accessible in case you need to recover data.
Once you've set up Time Machine backups on your external storage device, you can choose to back up automatically or manually:
Time Machine will automatically begin making periodic backups once you've selected your storage device in Time Machine settings.
To start a backup immediately, without waiting for the next automatic backup, you can choose Back Up Now from the Time Machine menu in the menu bar.
You can also use the Time Machine menu in the menu bar to check the status of a backup or skip a backup in progress. For example:
By regularly checking your backup status, you can ensure that your data is being backed up as expected and take action if necessary.
Logic Pro 11
Logic Pro's next-level update is about to be released. That is Logic Pro 11. This will be the best version ever as according to rumors Apple plans to introduce some additional improvements this time. With the upcoming macOS 14 Sonoma, musicians and producers get the opportunity to use Logic Pro 11 as the best-ever digital audio workstation. Are you ready to download Logic Pro 11? There is no need to be superior in editing music if you decide to use it. You can learn the app while using it. Follow the link here to get the latest updates on this upcoming version. Be on alert!
Logic Pro for macOS Sonoma
Logic Pro for macOS Sonoma is the latest update to Apple's renowned digital audio workstation software. With this new version, users can expect a smoother workflow, enhanced features, and even more powerful tools to produce professional-quality music and audio. Whether you're a beginner or a seasoned producer, Logic Pro on macOS Sonoma promises to elevate your music-making experience. It's a must-have for anyone serious about audio production on a Mac.
Logic Pro for macOS Ventura
Discover Logic Pro for macOS Ventura – the definitive choice for music creators and audio professionals. Elevate your sound with advanced editing, recording, and mixing capabilities. Ideal for both beginners and pros, this DAW seamlessly integrates with macOS Ventura, ensuring a smoother user experience. From MIDI instrumentals to full-track productions, Logic Pro offers tools tailored for every stage. Experience a world-class library of plugins, sounds, and loops. Upgrade to Logic Pro on macOS Ventura today and transform your musical vision into reality!
Backup Frequency and Duration
Time Machine is designed to make automatic backups of your files according to a specific schedule. By default, it makes hourly backups for the past 24 hours, daily backups for the past month, and weekly backups for all previous months. When the backup disk is full, Time Machine will delete the oldest backups to make room for new ones.
In macOS Ventura and later, you have the option to change the backup frequency. To do this, open Time Machine settings, click Options, and select a different setting from the "Back up frequency" menu.
It's worth noting that the initial backup may take a while, but you can still use your Mac while the backup is in progress. Time Machine only backs up files that have changed since the last backup, so future backups will typically be faster.